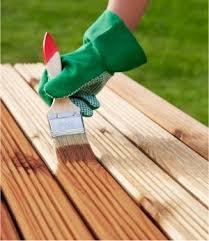
NOW THAT SUMMER IS APPROACHING, IT GIVES YOU MORE OF A REASON TO MAKE YOUR DECK COME ALIVE TO GIVE IT A BRAND NEW LOOK. PAINTING YOUR DECK REQUIRES TIME AND FOCUS TO ACHIEVE THE PERFECT FINISH, WHICH IS WHY WE HAVE PROVIDED A STEP-TO- STEP GUIDE ON HOW TO PAINT YOUR DECK THE RIGHT WAY, WITHOUT ANY HASSLES OR ERRORS.
1. Choose The Right Color
Purchase a few color swatches from your local outdoor garden suppliers,
and try it out on a very small area of your deck in natural daylight. It is
also good to consider whether you wish to go for a glossy finish or a flat
paint.
2. Clean Your Deck
It is important to make sure your deck is nice and clean before applying
paint. Your deck can be cleaned by pressure washing, and scrubbing and
sanding the wood, which may require time and hard work, but the end
result will definitely make it worthwhile.
3. Replace The Nails
It is important to remove any loose nails that are no longer wanted, and
replacing them with larger nails. This is to ensure that the wood is firmly
in place whilst applying the paint. Make sure to use a hammer and a nail
punch when applying the nails to your deck, and take your time during
this step to avoid any injury.
4. Use The Correct Materials
Make sure to wear safety gear before applying paint to your deck, such as
gloves, safety glasses, and the right clothes that you may not mind getting
paint on.
5. Begin to Paint
Start painting each wood board carefully, making sure you paint your
brush in the right direction for each board. Before you begin to paint,
make sure to figure out the easiest way to exit the area once you have
applied paint to your entire deck.
6. Re-Paint
Depending on how strong your deck absorbs the paint, apply another
layer of paint across your entire deck after letting the first layer dry for 24
hours. The second time should be much easier and quicker, to create the
perfect finish to your deck.


